Text On A Curve

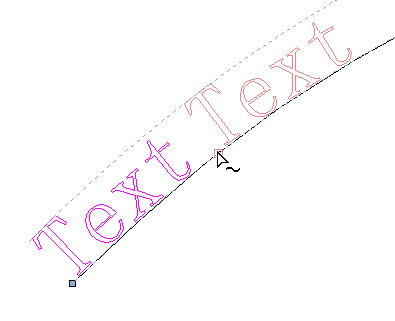
This tool requires the user to select a single line of text with the Draw Text tool and a single vector curve/line. It will take the text and fit it onto the selected vector to follow the curvature. Options within the tool allow position, space and location against the line to be edited.
To edit properties of text object that was already on a curve, just select the text object. To place it on another curve select both the text object and a vector.
It is also possible to use a closed vector to wrap the text around it.
Watch this video to see this in action:
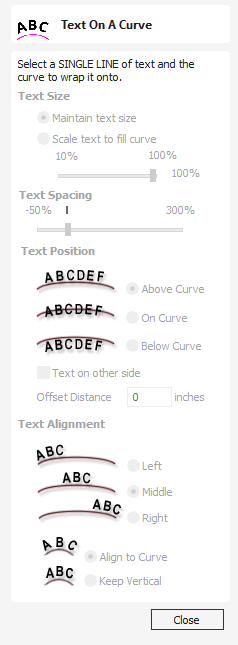
 Text Size
 Maintain text Size
Will not change the size of the text block

 Scale text to fill curve
Will increase the character size in order to fit along the entire length of the selected curve.
 Text Spacing
The slider can be used to increase or decrease the word and character spacing. Each time the form is opened, or new text is selected, this control starts at the 100% mark. While this text is being edited the spacing scale can be increased or decreased from its original value.
 Text Position
 Above Curve

 On Curve

 Below Curve

 Text on other side

 Offset Distance
Allows the text to be moved away from the curve by a specified distance.
 Text Alignment
The 3 options allow the text fitted to the curve to be aligned to the left, middle or right hand side of the selected curve. Or, when using a closed vector curve, relative to the Start Node.
Note
Remember the Start node can be changed using the Node Editing Tools available from the Right mouse menu and selecting Reverse Direction.
Characters in the text string can also be aligned 'normal' to the drive curve or left in the original vertical position.


 Position on the curve
The text's position on the curve can be adjusted interactively, by dragging the anchor point handle in 2D View.
